Thursday, March 31, 2011

Crispy Cottage Cheese Fingers - Uber Yumm!!


Kids can sometimes embarrass you like anything! A familiar, not-so-pleasant-situation for most parents. They say the most innocuous things at the most inappropriate of times. Innocent words which will have all the 5 liters of blood rushing to your face at that instant and in retrospect send you into peals of laughter. A mother of two, I have had many many such moments. Once, we were at a friend's place for lunch and the meal included pooris. My then 3-year-old son had asked me ''Amma, what is this?'' I sheepishly told my amused friend that deep-frying is something I rarely do. . I had once made pooris at home, my parents had called and hubby gleefully told them the highlight of the day. My Mom was shocked, brother wanted to know if the pooris were ahem, actually 'real' pooris or microwaved or baked ones. Oh yes, they had fun at my expense! My daughter had once wanted to know if Gulab Jamoons can also really be made at home!

Seriously - I really have a reputation for not making deep fried stuff. And no, am not proud of it.  Not that I don't use fat or I would not be writing a baking blog. I have a huge mind block against deep frying. Even now. I like to eat deep fried things, but not enough to make them now and then at home. They do not figure first on my can't-do-without food and I won't crave for them if I don't eat them for months, err..lets make that a month. Yes, desserts are my can't live without food. Put me off desserts for a week and they will start multi-starring in the blockbusters of my dreams. I am a complete die-hard dessert person.

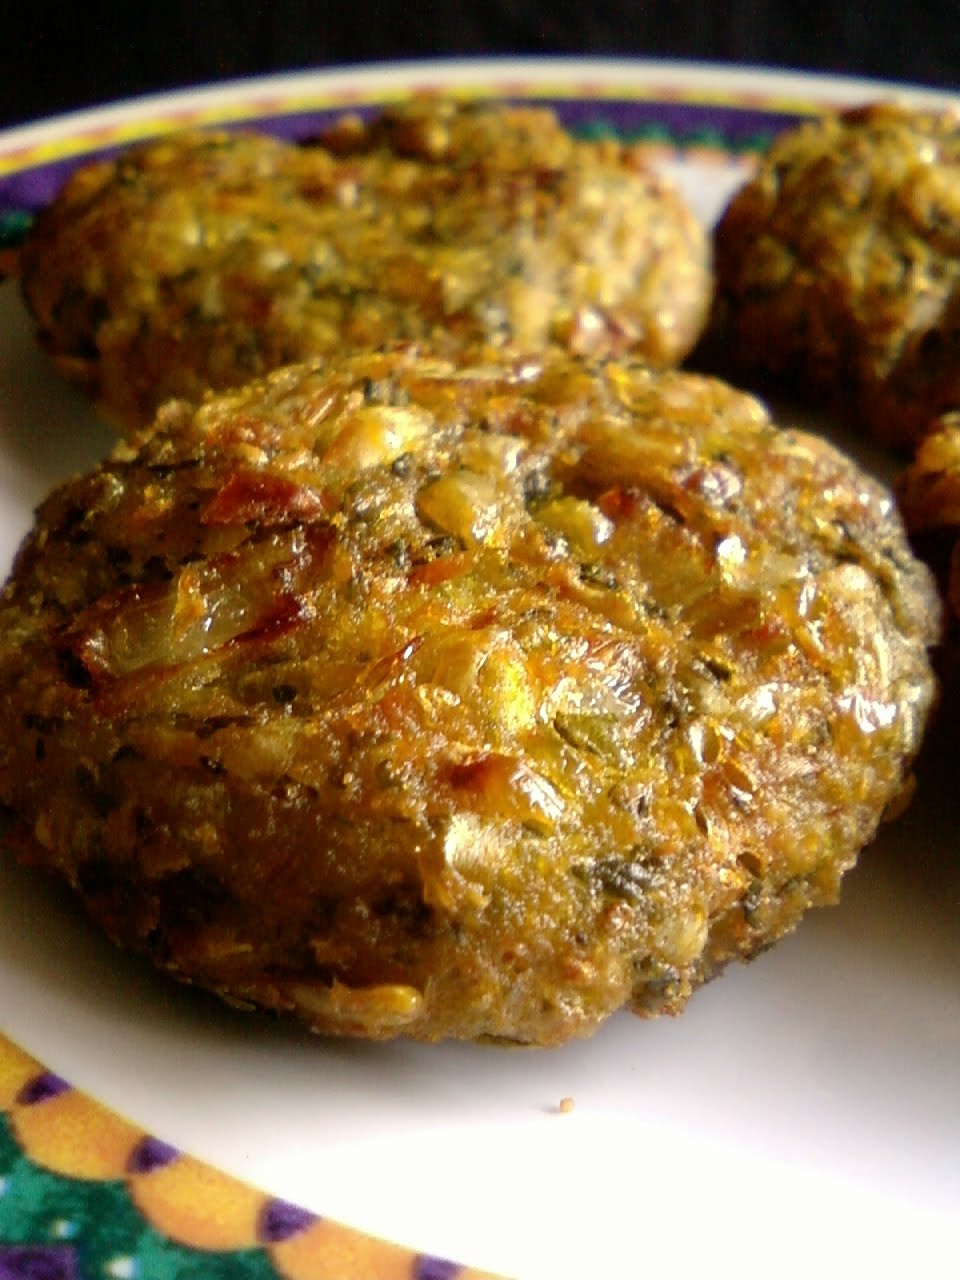
A friend of mine had got some special paneer from Amritsar for me. I was wondering what I must do with it. A wicked idea, a sinful treat, a recipe I have been drooling over since aa...ges. Cottage Cheese Fingers! Throw caution to the winds. Make it double sinful. Full fat super soft paneer (nothing less from Amritsar!), marinated in tomato and chilli sauce, encased in crispy, crispy covering. Mind-blowing! It was so so good, I could not stop eating at a couple of pieces, kids loved them to the hilt, hubby ate them with his eyes closed. No exaggeration this! I made these again as I wanted to put these on the blog;-) called son's cycling friends to help finish them, and they were a very happy bunch!

Well, all I want to tell you is - please, please do try this out! And don't blame me if you get very seriously addicted!


 The recipe has very few simple ingredients and paneer is undoubtedly the star here. If you would have to have the perfect, melt-in-the mouth contrast of textures, use best quality full fat paneer. If the paneer is not soft, it may become chewy and the dish will lose its wow factor.If you do not want to use paneer, you could use babycorn or tofu.


A Sanjeev Kapoor recipe again..can't help it!


Ingredients: 
Cottage Cheese (paneer) - 200 grams (full fat, best quality works best)
Tomato Sauce - 2 tablespoons
Red Chilli Sauce - 2 teaspoons
Cornflour - 1/4 cup
Maida / All purpose flour - 1/2 cup
Cooking soda - a pinch
Milk- 3/4 cup (approximately)
Salt to taste (remember, the sauce in the marinade has salt too)
Oil for deep frying

 Procedure: Cut the cottage cheese into 20 or 25 long fingers. In a mixing bowl, mix together the tomato and chilli sauce. Marinate the paneer fingers in them, taking care not to break the fingers. Keep aside for 15 minutes. While the paneer is marinating, mix the cornflour, maida, salt , soda and enough milk to make a medium thick batter. Start with half a cup and then add more as needed. I used about 3/4 cup approximately. If the batter is thin, the fingers will not be as crisp. Rest the batter for 15 minutes.

Heat enough oil in a deep kadhai. Dip the marinated paneer in the batter and deep fry on medium heat till the fingers are golden and crisp. Drain on a kitchen towel.


You could serve this with any sauce of your choice, but I feel that the subtle taste of the fingers can be best savored when the fingers are eaten hot as is.


Vermicelli and Dry Coconut Burfi

~ Semiya and Kobbari Burfi ~
Ingredients :

Vermicelli : 1 cup
Sugar : 1 cup
Dry Coconut Powder : 1/2 cup
Ghee : 1/2 cup
Cardamom Powder : 1/2 tsp (Optional)
A pinch of food color ( Optional )

Method :

Heat a teaspoon of ghee in a wok. Add and fry the vermicelli till golden color. Turn off the flame and allow it to cool. Grind the roasted vermicelli into a fine powder and set aside. Mix the sugar and little water and make a single thread sugar syrup. Now add the vermicelli powder, dry coconut powder, cardamom powder, food color and little ghee and mix very well. Stir continuously and keep on adding the ghee little by little. Cook until the ghee and mixture starts to leave the sides of wok. Turn off the flame and pour onto a greased plate and flatten immediately. Allow it to little cool and cut into pieces. Store in a air tight container and serve.

  • You can also check other sweet recipes here
  • Variations : Check out other recipes of vermicelli here
  • Back to Recipe Index

reposting for the event

I am sending some of my recipes to Only Original event hosted by Nivedita and stared by Pari.

  1. Corn and Mint Leaves Fritters
  2. Sweet Potato Bajji
  3. Spicy Sweet Potato Powder
  4. Vermicelli Cutlets
  5. Dates and Roasted Gram Laddu
  6. Black Eyed Beans Laddu
  7. Vermicelli and Dry Coconut Burfi

Cake Decorating Ideas For All Occasions

Cake Decorating Ideas For All Occasions

You beyond doubt don't need a special occasion to decorate a cake, but some events that can be made unforgettable and extra special with a decorated treat are holidays, birthdays, graduations, religious occasions, showers, weddings, and other personal special events.


Here are some cake decorating ideas that will help you make any occasion special:


Cake Decorating


New Year's Champagne Toast


Bake one 9-in. Round and one 9x12-in. Rectangle cake.

Cut the round in half. Use one half for the top of the champagne glass.

Cut a 2 or 3-inch long strip for the stem of the glass and a 2 x 4-inch section for the base of the glass. Piece them together to form the champagne glass. To be sure all the pieces stay together, lightly frost each piece separately before you piece them together.

Place the pieces on a cake board. Ice the top part (straight edge) of the half-round cake and the stem and base sections in white icing. Ice the lowest part (rounded edge) of the half-round cake in light yellow or light pink icing to look champagne.

Easter Egg Hunt (So easy kids can do it!)

Bake 6 large muffins. Cool and frost them with green icing. Generously sprinkle green shredded coconut* on top of the frosting to look grass. Place colored jelly beans within the coconut so they are half-hidden. Place small bunny toppers on the top of the muffins so they look as if they are finding the jelly beans.

*To tint shredded coconut, place coconut in a plastic bag. Add a few drops of food color. Knead color into coconut. Dry on waxed paper.

Spooky Halloween Brownies (Let the kids help!)

Bake your beloved brownies. When cooled, cut into 3-inch circles, using a cookie cutter or a pattern and sharp knife. Place a Halloween stencil (available in most stores) in the town of each brownie. Sprinkle the stencil with confectioner's (powdered) sugar. Take off the stencil. Edge the top and the lowest of brownie with tip 14 white icing stars.

Shiny Christmas Ornament

Bake a one or two-layer round cake. Ice the cake plane with white icing. Pipe tip 5 white icing lines across the top at 1-inch intervals. Vary the shapes of the lines, manufacture one straight, one zigzag, one curvy, etc. To look decorations on an ornament. Randomly pipe tip 5 icing balls and tip 16 stars between the lines also to look decorations.

Adult Birthday / special Occasion

Let Me Call You Sweetheart

Bake a heart-shaped cake and a heart-shaped mini-cake. Ice the larger cake plane with pink icing. Place the mini-cake in the town of the larger cake. Cover the mini cake in tip 16 red icing stars. Add a tip 14 red icing shell border at the lowest of the mini cake and a tip 16 red icing shell border at the top and the lowest of the large cake. Write your message in pink with tip 3 on the mini-cake.

Kids Birthday

Rainbow Train

Bake four mini-loaf cakes. (about 3-1/2 x 4-1/2 inches each.)

Ice each one plane - one with red icing, one with blue icing, one with green icing, and one with yellow icing. Use the cake iced in red as the engine: Make a smokestack for the machine with 2 large marshmallows. Frost them together with green icing. Attach the marshmallows to the top of machine with a toothpick. Using green icing, attach a piece of white curly ribbon or candy on the top of the smokestack for smoke and attach two white or yellow gum drops to the front of the machine for headlights. With a spatula, place a small mound of yellow icing on top of the yellow car; add small chocolate chips to look coal. Place two or three small plastic cars on top of the blue car. Stick small stick candies, such as licorice pieces on top of the green car to look metal parts. Decorate the sides of the cars with various small hard candies for decorations. For wheels: With icing the same color as the car, attach 4 large candy discs, such as peppermint swirls, to the lowest of each car. Associate the cars with one-inch licorice whips or pretzel sticks.

Up! Up! And Away

Bake two each: tulip, flower, butterfly and dragonfly cookies (eight total) and a 9x12-in. Rectangle cake. Ice the cookies plane in various pastel colors with thinned royal icing.** Decorate the iced butterfly cookie with tip 3 colored icing dots.

Ice the lowest half of the 9x12-in. cake plane with green icing and the top half plane with light blue icing to look grass and the sky. Place two small mounds of white icing on the blue half for clouds. Pat down "the clouds" with your fingers dipped in cornstarch. Place the tulip and flower cookies in the "grass" and pipe tip 3 green stems and leaves, if necessary. Place the one butterfly cookie near the flower cookie and the other butterfly cookie and the dragonfly cookies in the "sky." Write your message on the cake with tip 3 white icing.

**Royal Icing Recipe

2 cups sifted confectioner's sugar

2 scant tablespoons meringue powder

3 tablespoons water

Beat all the ingredients a low speed until the icing forms peaks.

(Makes about 1-1/2 cups)


Cake Decorating Ideas For All Occasions


Thanks To : Lopburi Hotels Thailand

Why Broccoli Salad is a Great option

Why Broccoli Salad is a Great option

Broccoli is a versatile vegetable. It is ideal in stir fries and you can also steam it, boil it, grill it, or roast it. Have you ever made a broccoli salad? Broccoli is just as tasty raw as it is cooked.


Perhaps you have tasted the favorite Ruby Tuesday broccoli salad, in which broccoli is combined with cheese, bacon, mayonnaise and other flavorful ingredients. This is a salutary yet appetizing dish and it is one of the best loved Ruby Tuesday recipes.


Chicken Salad


Health Benefits of Broccoli


Serve a broccoli salad as a side dish with any meat or fish or even as part of a buffet if you are having a party. You will love the flavor of it and also the nutritional value. Broccoli is a very salutary vegetable, as you probably already know, and is high in vitamin C, to aid the body's iron absorption, help with the symptoms of a cold, and prevent cataracts from developing.

Broccoli also contains folic acid, which is prominent for pregnant women, calcium to prevent osteoporosis and potassium to keep blood pressure at normal levels. It is also high in fiber.

Famous Broccoli Salad Recipes

There are copycat recipes available for pretty much any meal you can think of, so whether you are partial to Kfc, fond of sublime French onion soup or craving someone else sublime dish, the odds are that you can find it online. You might like to do an internet crusade for broccoli salad or a recipe crusade by ingredient to find the exquisite salad recipe.

Bear in mind though that not all copycat recipes are equal and some will not give you a good succeed at all so compare copycat recipes and read reviews of the dish, if they are available, to give you a better idea. Making copycat recipes can be a bit hit and miss sometimes but when do you find a great one, whether print it out or bookmark it so you can find it again.

Also, you do not have to stick rigidly to a recipe that you find online if you want to tweak it a little. You can spice a recipe up, substitute one ingredient for someone else or tweak it to make it unique. Use existing recipes as a basis to develop your own recipes.

Some recipes are exquisite just as they are though. It is difficult to enhance on the sublime Ruby Tuesday broccoli salad, for example!

Other Ways to Make a Broccoli Salad

You can concentrate broccoli with other vegetables such as zucchini, carrot, and cauliflower to make a raw vegetable salad. Add some mayonnaise and whether mustard, ketchup or curry powder to give the salad a appetizing flavor. The texture of the raw vegetables might seem unusual to you if you are used to eating cooked vegetables but raw broccoli or gradually steamed broccoli is truly good. Try it and see!

You might like to make a broccoli and macaroni salad or a broccoli and rice salad. Broccoli is delicious, nutritious, and versatile, Making it a great choice for salad recipes as well as lots of other dishes.


Why Broccoli Salad is a Great option


Friends Link : Hotel Thailand Cakes Recipe and Cake Decorating Bangkok Hotel

Wednesday, March 30, 2011

Loong Kee Vietnamese on Kingsland Road

After deciding that I couldn't live without the £300 cardigan, I dragged my ill self to Selfridges on Saturday to finally be reunited with it. However, the reunion was not to be a happy one... we spent a crazy half an hour in the changing rooms together, with me putting it on, taking it off, turning round and round like a dog chasing its tail, trying to see it from every angle and generally acting like a mad person, before running hot and flustered from the store saying "I can't do it". I think it was the right decision, though, because I haven't thought about it that much since. And it means I can have a normal life this month, doing all the things I like to do, such as going out for dinner with friends...

Loong Kee used to be one of the lesser known Vietnamese restaurants around the Old Street area, which had a lot of charm - they only took cash, the menus were on A4 sheets of paper, the food was great and it felt like a bit of a cool insider secret. Well, the cat is definitely out of the bag - they have expanded to the shop next door and the millions of staff run around busily in Loong Kee T-shirts. On the plus side, they do take card now, they're still incredibly friendly and the food is still good and so amazingly cheap that it cost under £30 for the three of us (plus booze, but you bring your own)


We ate steamed rolls with minced pork and mushrooms, fried king prawns with ginger and spring onion,  rare beef with lemon juice and fried mixed vegetables, with steamed rice. The rare beef (up there) was my favourite, because it was like an asian steak tartar, with mint, coriander and chilli. A close second came the rolls, as the filling was so delicious and the crispy lettuce and sauce complimented them really nicely. The other stuff was great too though. If you want to come here at the weekend, it's worthwhile booking a table because by the time we left (about 8.30pm) there was a massive queue outside

Monday, March 28, 2011

Homemade Vanilla Extract

 
Vanilla... one of the most irresistible smells ever. Imagine baking without vanilla! That wonderful smell wafting in your kitchen and home, can there be a more welcoming aroma which can make your house smell like home? I love vanilla and whenever I see the little black bottle in my fridge, I feel like baking. Agreed, we have grown up seeing and eating goods baked only with synthetic essence, but vanilla is vanilla.

Vanilla extract in stores in India, is one of the many many baking ingredients unheard of. Except in very rare specialty stores. I have been using synthetic vanilla essence since the time I have been baking. I have used a couple of bottles of pure vanilla extract a few years ago, when I was not yet obsessed with baking and did not even know that there is something called as pure vanilla extract. Oh boy! I did not realize that what sis-in-law has sent from the US was pure vanilla extract! I used it freely in my cakes, but not without realizing that it was indeed imparting a very different taste to the one and only sponge I used to bake rarely. And then I realized that vanilla extract is indeed special.

Vanilla is supposed to the most expensive among spices, next only to saffron. The reason being extensive labor needed to cultivate the pods. Dark, shiny, plump and moist are the kind of beans which are of good quality - as opposed to the thin, shriveled and dry ones. They are sometimes coated with a white substance, they are vanilla crystals. Vanilla is available as pure extract, pods and vanilla powder. The bean is split into two and the tiny seeds are scraped out and added to cake batter, ice creams, custards etc. The beans can be dunked into milk, custard etc to infuse the flavor. Then the beans can be rinsed, dried and buried in sugar to gradually infuse the flavor into sugar, giving you vanilla sugar. The best beans come from Tahiti, Madagascar and Mexico. Tahitian beans are supposed to be the most aromatic ones and larger in size too, hence less of it needed in a recipe. Source - Rose Levy's Cake Bible & Wikipedia.

And it was a discovery to see home-made vanilla extract on Deeba's and then on Shaheen's blog. Fabulous! Sounds so very easy! Split vanilla beans and dunk them in vodka for 6-8 weeks and your extract is ready for use! Yes, I made my Vanilla Extract at home!


Had got some beans on my trip to Madikeri some time ago and had been wanting to make the extract. The beans looked quite good, not as plump and shiny as I have seen on other blogs.. sigh!! But hey, got to make the best of what's available.

Finally made it, just waiting for a week more to bake with it. It had better be good!!!

Here is how we do it...
Ingredients:
180 ml vodka
2 vanilla beans or more ( I used 3)
A sterilized bottle (a pretty yet functional one if u want to post this on your blog!)


Procedure which can hardly be called one! : Slit the beans vertically with a clean sharp knife . Then cut horizontally into 2 parts. Oops! Forgot this in my excitement! I have used 3 beans, that's a consolation.

If you would be using a new bottle. do sterilize it before you put the vodka in. I am very lazy so I used the vodka bottle itself.

        
Then dunk them into the vodka. Take a moment to admire how beautiful this looks.


I also took time to remember my Physics teacher in school... and yaaawnnn...the theory of refraction... Never was interested in Math and Physics! OK, back to the exciting vanilla!

Shake the bottle everyday. The extract is ready for use in 6-8 weeks. Shaheen says you could use used beans for this as they have loads of flavor left. Aren't the beans full of beans???:-)

Been meaning to check out vanilla beans at Maison des Gourmets and Supermarket, yet to. Will keep you posted on this..The better among the beans available in India are supposed to be the ones grown in Kerala. Would appreciate if you could recommend a supplier there.

For more tips on how to identify good vanilla and more check Shaheen's space here .


Reverse Osmosis Plant Pakistan R.O.Tack Water Technology Slideshow & Video

Reverse Osmosis Plant Pakistan R.O.Tack Water Technology Slideshow & Video:

Munakkaya Tomato Koora ~ Drumsticks and Tomato Curry

Ingredients :

Drumsticks : 3
Ripe Tomatoes : 3 (approx. 1 1/2 cups)
Onion : 1 big sized
Mustard Seeds : 1/2 tsp
Chana Dal : 1/2 tsp
Urad Dal : 1/2 tsp
Curry Leaves : 1 stem
Red Chilli Powder : 1 tsp
Sugar : 1/2 tsp
Salt to taste
A big pinch of turmeric powder
Oil : 2 tsp


Method :

Wash and chop the drumsticks into small pieces and cook until tender but not mushy. Chop the tomatoes and onion into small pieces and set aside. Heat oil in a wok and add the mustard seeds,chana dal and urad dal and let them splutter. Then add the curry leaves and chopped onions . Fry the onions till they are translucent. Now add the chopped tomatoes, sugar, salt, turmeric powder, red chilli powder and little water it and cook for few minutes. Then add the drumsticks and cook for another 5 minutes. Turn off the flame and serve with hot steamed rice or roti.

  • You can also check other curry recipes here
  • Variations : Check out other recipes of drumsticks here
  • Back to Recipe Index

Sunday, March 27, 2011

Vermicelli noodles in yogurt sauce (Thayir semiya)

This is an interesting south Indian recipe, occasionally served in wedding feasts. I would consider it as a combination of a few south Indian recipes - the vermicelli upma, yogurt rice or raita. My husband and I like this version - it seems to contain the goodness of them all, yet so easy to prepare and serves as a guilt-free one-pot meal.


Ingredients:

vermicelli - 1 cup
carrot(diced)+beans(cut)+cabbage(grated)+peas(boiled) - 1 cup
mustard seeds - 1/2 tsp
black gram - 1/2 tsp
cumin seeds - 1/2 tsp
green chillies - 3
yogurt - 1 1/2 cups (beaten)
cumin powder - 1/2 tsp
chaat masala - 1/2 tsp (optional)
curry leaves - 1 stalk
cashewnuts - 2 tbsp (broken)
raisins - 1 tsp
salt - 1 tsp (adjust to taste)
asafoetida - a pinch
oil - 1 tbsp

Method:

Heat 2 1/2 cups of water along with vegetables and salt (for about 2 minutes if you use the microwave). Keep aside.

Add cumin powder, chaat masala and a little salt to the beaten yogurt. Mix well and set aside.

Heat oil in a frying pan and add mustard seeds, urad dal, cashews, cumin seeds and asafoetida. When it splutters, add green chillies and curry leaves. Then add vermicelli and roast until it turns light brown. Add the water+vegetables and cook until done.

Mix in the yogurt mixture. Decorate with raisins and serve fresh.

Note:
Upto twice the quantity of the yogurt sauce can be used, depending on the consistency and taste you like.

Bangaladumpa Pindi Miriyam ( Potato and Pepper Stew )

~ Aloo Gadda Pindimiriyam ~

Ingredients :


Boiled Potatoes : 2 medium sized
Toor Dal : 1 cup
Red Chilli Powder : 1/2 tsp
A big pinch of turmeric powder
Salt to taste

For Paste :

Coriander Seeds : 1 tsp
Chana Dal : 1 tsp
Rice : 1/2 tsp
Black Pepper : 1/2 tsp
Dried Red Chillies : 2
Grated Dry Coconut : 1 tsp
Tamarind : Gooseberry sized ball

For Seasoning :

Mustard Seeds : 1/2 tsp
Dried Red Chilli : 1
Curry Leaves : 1 stem
A pinch of hing
Oil


Method :


Put the cup of washed toor dal and two cups of water in a pressure cooker and cook for 3 whistles. Switch off the heat and wait until the pressure go off.

heat a teaspoon of oil in a pan. Add and fry the coriander seeds, chana dal, black pepper, rice and finally red chillies to light brown color. Turn off the heat and let it cool completely. Add the tamarind and coconut to it and grind into a smooth paste using little water. Keep it aside.

Put the paste mixture, salt, turmeric powder, red chilli powder and 2 to 3 cups water in a heavy bottomed pan and let it cook for ten minutes on medium flame. Now add the cooked toor dal, boiled and cubed potatoes. Let it cook for another 5 minutes and remove from the heat. Heat a teaspoon of oil in a pan for seasoning and add the mustard seeds. When the start to splutter add the curry leaves, hing and red chilli. Add this popu / tadka to the stew and mix well. Serve warm with steamed rice.


Tack Lab SOLUTIONS' Model RO Lab Tack 501 Standard System LAB WATER SYSTEM


Tack Lab SOLUTIONS' Model RO Lab Tack 501 Standard System LAB WATER SYSTEM

reposting for the event

I am sending some of my recipes to MLLA 33 hosted by Dee and started by Susan

  1. Indian Broad Bean Seeds Curry
  2. Palak Mangodi
  3. Roasted Gram Jaggery Laddu
  4. Amaranth Leaves with Toor Dal
  5. Dates and Roasted Gram Laddu
  6. Peanut Burfi
  7. Coconut and Toor Dal Chutney
  8. Spicy Tood Dal and Coconut Powder
  9. Plantain Masala Vada
  10. Deep Fried Chana Dal
  11. Puffed Rice and Green Peas Upma
  12. Beans Pesara Patoli
  13. Red Pumpkin Usli
  14. Beetroot with Spiced Dalia Powder
  15. Eggplants with Spiced Dalia Powder
  16. Spicy Dalia Powder
  17. Kandi Pachadi
  18. Tomato Toor Dal Chutney
  19. Kandi Podi
  20. Spinach and Toordal Stir fry
  21. Pesara Vadiyalu
  22. Pesara Ulii Pachadi
  23. Garlicky Peanuts
  24. Vermicelli & Roasted Gram Chakli
  25. Boondi Laddu
  26. Red Pumpkin Curry with Besan
  27. Plantain with Besan
  28. Alasanda Sunni
  29. Palli Pakoda
  30. Spicy Peanuts and Coconut Powder
  31. Coconut Peanuts Chutney
  32. Coconut Dalia Chutney
  33. Spicy Roasted Peanuts
  34. Oats Peanuts Laddu
  35. Oats Dalia Laddu
  36. Beans Curry with Poppy Seeds
  37. Beans Kobbari Karam
  38. Sweet and Sour Beans Curry
  39. Roasted Gram Laddu
  40. Roasted Gram Coconut Laddu
  41. Palleela Chimmili
  42. Peanut Laddu
  43. Sunnundalu
  44. Chitti Vadiyalu
  45. Amaranth Leaves and Moong Dal Fry
  46. Annamlo Podi

Saturday, March 26, 2011

Karachi : Repairs and Maintenance : R.O.Tack water technology | Pakistan Local Classifieds | Buy | Sell | Offers

Karachi : Repairs and Maintenance : R.O.Tack water technology | Pakistan Local Classifieds | Buy | Sell | Offers

Vermicelli Cutlets


Ingredients :


Vermicelli / Semiya : 200 gms
Boiled Potatoes : 200 gms
Rice Flour : 1/2 cup
Grated Carrot : 50 gms
Chopped Onion : 50 gms
Garam Masala : 1 tsp
Red Chilli Powder : 1 to 2 tsp
Chopped Fresh Coriander : 1 bunch
Salt to taste
Oil for deep frying

Method :

Mash the boiled potatoes and set aside. Bring water to boil and add the vermicelli and a teaspoon of oil. Let it cook completely. Switch off the flame and drain the excess water. Combine the mashed potatoes, chopped onion, boiled vermicelli, chopped coriander, salt, red chilli powder, rice flour and grated carrot. Mix very well and shape into small shapes. Deep fry them in hot oil till golden color on both sides evenly. Remove and place them on a tissue paper. Serve hot with tomato ketchup and a cup of chai.

  • You can also check other snack recipes here
  • Variations : Check out other recipes of vermicelli here
  • Back to Recipe Index

Friday, March 25, 2011

De-constructed oozing Tiramisu


Ciao lettori bella, this months Forever Nigella theme was Italian,  Ciao Italia, and had to either be an Italian recipe or a recipe which showcased an Italian ingredient.

I had my thinking hat on for some time, until this weekends deadline was looming and I'd still baked nothing. Then inspiration struck, I decided to make a version of Nigella's Irish Cream Tiramisu from Nigella Express but instead of using the Savoiardi as the base for the dreamy gooey marscapone (Italian!!) mixture I baked some of Nigella's cupcakes, from How to be a Domestic Goddess using my new filled cupcake tray, a birthday gift from my gorgeous friend Rene in Chicago.


The cupcakes were a doddle to make and filled 11 of the wholes in my tray. I wasn't complaining though as (a) it meant I could like the bowl clean (and it was delicious batter- just the kind I like, nice consistency and nice and sweet but not too much - you can tell how good a cake is going to be from the batter!) and (b) It meant I had a spare if need be, or I could just eat it as a tester!

When they came out of the oven it was a bit of a faff to get them out of the moulds, even though it says they're non stick and will come out with no hassle (I slightly greased the tins as well just incase). Most came out ok, although some of the swirly edges weren't keen to release.

Instead of Irish Cream I used a hefty glug of Marsala (Italian!!) mixed with some fabulously strong Monmouth coffee I bought earlier in the day. The girl in Monmouth was lovely, helping me choose the right blend for this -  you don't get that service in Starbucks, or many other "fancy" cafes for that matter. I dunked the cake tops and bottoms in the mixture, maybe a little too much as they got quite moist, and then left them to dry a bit.

The tiramisu topping was made with marscapone, egg yolks, sugar and a whisked egg white. Oh, and lashings more Marsala. This is where I think I went a little wrong as I added some extra booze as I like my tiramisu to have a good kick so my topping didn't set quite enough I think, or this could be because we didn't set it in the traditional way.


As you can see it's a little runny but it tasted really nice so we slapped it into the cavity on the bottom cupcake, then placed the top of the cupcake which had some more of the filling inside. Be warned these cupcakes aren't very pretty but they do taste amazing!


Ooooh look it's a bit of a gooey mess....and it's about to get worse....


We poured a little more of the filling over the top to soak the Marsala soaked cupcake some more, and covered with a dusting of cocoa. As Nigella might say the topping ooozed seductively down the cupcake topper.

It doesn't look the prettiest cupcake but boy was it good - very rich and very boozy but very very good.

I can see Nigella pouting seductively at the camera eating this, she does love food that oooozes after all!

Corn and Mint Leaves Fritters

Mokkajonna Pudina Vadalu ~ Corn and Mint Vadai

Ingredients :


Fresh Corn Kernels : 1 cup
Fresh Mint Leaves : 1 cup
Rice Flour : 1 to 2 tbsp
Green Chillies : 4 or 5
Onion : 1 big sized
Ginger : 1 inch piece
Garlic Cloves : 2
Salt to taste
Oil for deep frying

Method :

Peel and chop the onion into small pieces and set aside. Grind the corn kernels, mint leaves, green chillies, ginger and garlic cloves into a coarse paste. Add the chopped onion, salt, rice flour to it and mix well. Apply little oil or water on palm. Take small lime size ball of corn dough, flatten them a little and deep fry them in hot oil till golden color on both sides evenly. Remove from the oil and serve hot with tomato ketchup and a cup of chai.

  • You can also check other snack recipes here
  • Variations : Check out other recipes of corn here
  • Back to Recipe Index

Thursday, March 24, 2011

A rum do - the daiquiri cupcakes that taste of nothing


Last week while doing my usual trawl of the internet for cupcake goodies I discovered these beautiful cupcake cases from Hus and Hem and I just had to get them. As well as the gorgeous Snorkmaiden ones, I got green Moomin ones and some huge oriental cases - they are massive!! 

I also got, just seen in the top picture, Cake Days, the second book by Tarek Malouf of the Hummingbird Bakery and spent some time deciding what to bake with from it that was suitable for my moomin cases. 

Then I remembered that Moominpappa makes punch that includes strawberry liquer and decided to make some strawberry daiquiri cupcakes. In the book these are actually mini cupcakes, but they have different timings at the back in the extensive notes so I thought it'd be simple enough. 

We bought some rum and some strawberries and got baking. Well first we had to make some sugar syrup - with a load of rum in it, in which you basically boiled off all the alcohol from the rum making it a rather expensive sugar syrup. Hurumpf. Deciding I wanted a proper cocktail cupcake, I bunged in some more rum after the sugar syrup cooled - who wants a virgin cupcake? Once my strawberries were soaking in the boozy syrup I got to work on the cupcake. 

The recipe called for very little butter,  lots of sugar, and only one egg. When I started making it I really had some doubts about whether they'd work - the mix just looked and felt wrong. It's all pretty normal, you mix, you put into the cupcake cases with the boozy strawberries (drained from the syrup) and put them in the oven. The book says you will get 24 - 30 mini cupcakes which I assume to be half size(ish) - I got 8 or so quite measly sized normal cupcakes. 

I baked them till they were golden brown and springy to the touch - however there was a bit of a wrong feel about them. You know when you can just tell? Anyways, I carried on. I put the reserved alcoholic sugar syrup on the cakes, not realising that later in the recipe it tells you you should've reserved some. Double hurumpf. 


Apart from feeling wrong, they looked prettyish in their case and domed really well, so I gave them the benefit of the doubt and cracked on with the frosting. Of course I didn't have the reserved sugar syrup so I substituted it with a hefty glug of rum. The frosting worked quite well and had a nice fresh taste from the lime zest, however it didn't pipe very well as my beloved 1M nozzle got squished and kinda squirty out a bit funny. They did scrub up quite well though.


Alas they look much prettier than they tasted. I can only say they tasted overly sweet with a really unpleasant after-taste. The cake was sticky (could've been the sugar syrup cuz I used too much?) and also that cheap muffin like texture you get from bad cupcakes. Really not to my taste - I actually couldn't swallow more than one bite. Manny being the guzzly guts that he is decided to persevere and ate one, saying it was ok, but then he decided on the second one they really weren't and gave up.

I will try some other recipes from the book as they look really good - there are some lovely looking whoopies in there, but I may use the cupcakes for ideas only as these were incredibly disappointing.

Chikkudu Ginjala Masala ~ Indian Broad Bean Seeds Curry

Papdi Lilva Kurma ~ Chikkudu Vithanala Masala Koora

Ingredients :

Indian Broad bean Seeds : 2 cups
Onions : 2
Tomatoes : 2
Peanuts : 1/2 cup
Coriander Seeds : 1 tbsp
Cloves : 2 or 3
Cinnamon Stick : 1/2 inch piece
Ginger : 1 inch piece
Garlic Cloves : 1 or 2
Cumin Seeds : 1/2 tsp
Turmeric Powder : 1/4 tsp
Red Chilli Powder to taste
Salt to taste
Oil

Method :

Heat a teaspoon of in a skillet. Add and fry the peanuts, cloves, coriander seeds, quarter teaspoon of cumin seeds and cinnamon stick to golden brown color. Switch off the flame and allow it to cool. Bring 2 cups of water to boil. Add the broad bean seeds and salt and cook for 5 minutes. Turn off the heat and drain the excess water. Heat a teaspoon of oil in a pan. Add the chopped onions and fry the till onions are translucent. Let it cool completely. Grind the roasted spices, onions, chopped tomatoes, ginger and garlic into a smooth paste adding with little water. Heat a table spoon of oil in a wok. Add the cumin seeds and let them splutter. Now add the boiled broad bean seeds, ground masala, salt, red chilli powder and turmeric and mix well. Add a cup of water and cook for 10 minutes on low or medium flame. Then add the chopped coriander leaves and serve warm with roti or chapathi.

You can also check other curry recipes here

Back to Recipe Index


Orange Rice Pudding


Like a lot of us, I love to read food and baking books. I buy some, borrow some from the library and some  from friends. Oh yes, am quite greedy here! I own a handful of books, out of which more are about desserts or about baking.  In my opinion, most baking , however healthy, is only relatively so, hence can't obviously eat these on a daily basis. I confess that my everyday food more or less revolves around a very familiar, boring menu. I love to spend time on new bakes, desserts and snacks for the kids, but when it comes to everyday food, I treat it as something to get over and done with as early as possible in the morning. It fails to pump that adrenalin in my blood like baking does.

My growing boredom with the food I cook (sounds familiar?) leads me to think I must introduce more variety in our everyday meals, without that overload of calories and fat. And I recently realized that I must get more books on healthy everyday food too, rather than more and more baking books.  Of course there is the internet always, but books are books. Period! Can you imagine anything better than curling up on the couch with a good food book for dessert? One of the most blissful things in life...Even better when the book can give you interesting, doable and easy low calorie recipes for everyday food. Makes cooking your everyday meal less monotonous. I like this book by Sanjeev Kapoor titled 'Low Calorie Vegetarian Cookbook'. Which is your favorite book in this genre?

Tried out 'Orange Rice Pudding' from this book. A zesty, unconventional dessert - rice cooked in milk, baked with dates, raisins, orange juice sweetened with a little honey. A simple and refreshing, low fat sweet ending after a summer meal...


I have made minimal changes in the recipe adding more dates and less of raisins as the former gets more votes in the family..


Ingredients:
Rice - 1/3 cup
Skimmed milk - 3 cups (the recipe has 2 cups)
Seedless dates, chopped -1/3 cup
Raisins- 2 tablespoons (original recipe has 1/2 cup)
Freshly squeezed orange juice - 1/2 cup
Orange zest - 1/2 teaspoon (refer note)
Vanilla essence - 1/4 teaspoon
Honey - 1 1/2 tablespoons (even less will do fine, refer note)

Procedure: Soak the rice in enough water for half an hour. Soak raisins in water for fifteen minutes. Squeeze out the excess water. Drain the rice.
Boil milk in a non-stick pan. Add the drained rice, lower the heat and cook till the rice is soft . I had to add more milk by the time the rice was cooked. I also wanted some milk left with the rice as I wanted to serve the pudding chilled. If you wish to serve the pudding warm, more milk may not be needed as there is no fear of the liquid being absorbed when the pudding chills.
Once the rice is cooked, cool it to room temperature. In the meantime, pre-heat the oven to 160 degrees C. Whisk the orange zest into the juice with a fork. This is to avoid clumps of zest in the pudding. Add the dates, raisins, honey, vanilla and the orange juice. Transfer this to an oven proof dish and bake for 15 minutes. Serve warm or chilled.


Please note:

You can change the quantities of the dry fruit to suit your taste. But the quantity of honey may vary depending on the kind and quantity of the dry fruit. Though I have not made a drastic change here, I found the pudding surprisingly sweet even when chilled. It would have been better with just one tablespoon of honey. Do go by your taste and preference.


Wednesday, March 23, 2011

Apple Custard


Ingredients :


Apple : 1 medium sized
Milk : 1 1/2 cups
Custard Powder (I used Vanilla Flavour) : 4 tsp
Sugar : 4 to 5 tbsp


Method :

Bring 2 cups of milk to boil. Add the sugar and allow it to melt. Dissolve the custard powder in remaining cold milk and add it to the boiling milk. Stir it continuously on low flame and cook till the custard thickens. Switch off the flame and allow it to cool. Wash, peel and chop the apple into small pieces. Combine the custard and chopped apple and refrigerate for few hours. Serve cold.

Tuesday, March 22, 2011

Dessicated Coconut Laddu with Condensed Milk ~ Quick Version


Ingredients :


Dessicated Coconut : 2 1/2 cups
Sweetened Condensed Milk (Milkmaid) : 1 cup
Cardamom Powder : 1/2 tsp


Method :


Mix the condensed milk, cardamom powder and two cups of dessicated coconut in a bowl and knead into a soft dough. Make small balls out of the dough and roll them in the remaining coconut. Store in a air tight container and serve.

You can also check other laddu recipes here.

Karachi, Pakistan - Local free classified ads for Pakistan

Karachi, Pakistan - Local free classified ads for Pakistan

Monday, March 21, 2011

A delicious "broke-ass" meal

I am truly terrible with money - every month I work out my finances and it all seems fine, and every month there's a at least a few days where I am completely and utterly broke, and end up putting random meals together from whatever I have in the cupboards. Mostly, it's nothing to write home about, but a couple of days ago there was an exception. I can't believe how amazingly delicious my "broke-ass meal" was! What I found in the cupboards were the following:

2 shallots
garlic clove
bit of fresh ginger
tin of tuna
season all
dried thyme
fish sauce
(black) buckwheat
black pepper
Bit of tomato puree
Bit of hot pepper sauce
Knob of butter
Olive oil
(I also bought) 1 courgette

And this is what I created


I chargrilled the courgette first on the open stove first, then added it, chopped to the frying shallots, garlic and ginger before sticking all the other ingredients in, bar the butter and buckwheat - simples. The buckwheat is Polish "kasza gryczana", which is very popular in Eastern Europe and difficult to find in the UK, but you could use other types of grain. The traditional way of cooking the black buckwheat was to wrap it up like a baby and put it under a pillow to steam for about forty minutes, but I just cook it like rice, then stick some butter in at the end

Next month I am set to be even poorer than this month, because yesterday Anna and myself went on a quest for the "summer look". As usual, Anna found nothing she wanted and I fell in love with something I can't afford. Is £300 too much for a cardigan? You should see this one though! I have asked them to put it aside until payday for me. I will probably spend a month sitting at home twiddling my thumbs, eating bread and drinking water, but what can I do? I'm just not the sort of person to deny my feelings...

Menthikura Tomato Pappu ~ Tomato Methi Dal


Ingredients :


Chopped Fenugreek / Methi Leaves : 2 to 3 cups
Toor Dal : 1 cup
Onion : 1 big sized
Tomatoes : 2
Tamarind : Gooseberry sized ball
Green Chillies : 3 to 5
Red Chilli Powder : 1/4 tsp (Optional)
Mustard Seeds : 1/2 tsp
Chana Dal : 1/2 tsp
Urad Dal : 1/2 tsp
Dried Red Chillies : 1
A big pinch of turmeric powder
Salt to taste
A pinch of hing
Oil : 1 tsp


Method :


Put the toor dal, chopped methi leaves, chopped tomato, chopped onion, green chillies, tamarind and 2 cups of water in a pressure cooker and cook for 3 whistles. Switch off the flame and wait until the pressure go off. Remove the dal mixture from the cooker and add the salt, turmeric powder and red chilli powder and set aside. Heat oil in a pan and add the mustard seeds, chana dal, urad dal and let them splutter. Then add the red chilli and hing and fry for few seconds. Add the dal mixture and cook for another few minutes. Serve with roti or hot steamed rice and dollop of ghee.

Tack Lab SOLUTIONS’ Model RO Lab Tack 501 - Other in Karachi

Tack Lab SOLUTIONS’ Model RO Lab Tack 501 - Other in Karachi

Sunday, March 20, 2011

Garlic And Herb Potatoes


 Heaving a sigh of relief as my son's exams see the last! Whew! No assignments or tests for the next couple of months and I am so pleased about that. The kids have to go to school for a few days post exams as they will have a project show on the last day of school. Isn't that an even better thought?  - them going to school (half a day though) and me not having to worry about any homework ;-). They are so excited that they get to showcase to parents all that they have learnt during the year. My four-year-old daughter's big aim is now to go to the next class, Lower Kindergarten. I shamelessly blackmail her sometimes as the last resort at times - going to LKG undoubtedly the carrot I dangle in front of her cute little nose. It works most of times and I quickly have to find a new thing to blackmail her with once she is gets to her current dream destination. Yes, yes am a wicked Mom! Son's an easier nut to crack, thankfully, a game of bey-blading and cycling with his peers takes care of most his woes in the 9th year of his life. Innocent childhood...it touches me so much at times...

I remember watching the movie Masoom all those years ago when the kids were still not in the scene. I dare not watch that movie now, as I am very sure, Jugal Hansraj will leave me more than a tad misty eyed ... being a parent makes you relate to the innocence of childhood and that over-whelming parental love. If you are already a parent and you have watched Taare Zameen Par- you have heard the joke- you will not yell at your kids for one full day after watching the movie:-) When the kids are ready to do anything to make you smile at the sight of your crest fallen face, it makes you cry. When you are ready to throw anything at them just for a moment of much wanted peace, that makes you cry too, albeit in a different sort of way:-).

Well, when life throws lemons at you, you make lemon pie, when all you have is a bag of baby potatoes at snack time, you dish up some hearty, filling and easy Garlic And Herb Potatoes...

 Super versatility is the other name of taters and this time around, tender baby potatoes boiled, lightly grilled and tossed in garlic and herbs. A nice and easy side-dish any day to liven up a simple meal.

Recipe adapted from various sources. One of those recipes which can be altered to a great extent to suit your taste. So feel free to tweak.

Ingredients :
Baby potatoes: 600 grams
Garlic pods : 5-6, finely chopped.
Olive Oil - 1 1/2 teaspoons
Low fat mayonnaise - 1 tablespoon
Fresh parsley, chopped - 1 tablespoon
Fresh dill leaves, chopped - 1 tablespoon
Red Bell Peppers, chopped - 1 tablespoon
Salt and freshly ground pepper to taste.

Procedure: Boil the baby potatoes till tender, do not overcook. I cooked for 2 whistles in my pressure cooker. Cool. Peel the skins(or leave them on). Heat the oil in a non-stick pan. When the oil is warm (not hot), add the chopped garlic.Saute till the raw smell disappears. Do not allow the garlic to change its color. Remove the lightly toasted garlic from the oil and reserve. (You could leave it in, but it may get over done by the time you are finished with the potatoes).
Add the potatoes, toss lightly and cook on medium heat. Keep tossing in between so that the potatoes are light golden. I tried to toss them the way chefs do, err.. but it was not all that a graceful toss.. hope to learn to do this well.. in a few years time for sure!

When the potatoes are golden add the herbs, salt and pepper. Saute for about half a minute. Add the red bell peppers. Take off the heat. Add the reserved toasted garlic. Mix in the mayonnaise to coat the potatoes well. Serve immediately.


Variations: You could use any herb or herbs of your choice, reduce oil further or add more mayonnaise. You could grill the potatoes as above, but add the mayonnaise only after the potatoes are cooled or just before serving. The potatoes will be more creamy this way and you could serve this as a cold side-dish.